Increase hard disk size in VirtualBox 4.x #
(UPDATE: See this post for a far easier and faster method.)
If your VirtualBox virtual machine is running low on disk space, here's how to allocate more:
0. Shut down virtual machine & quit VirtualBox
1. Locate VDI file
$ VBoxManage list hdds
UUID:        xxxxxxxx-xxxx-xxxx-xxxx-xxxxxxxxxxxx
Parent UUID: base
Format:      VDI
Location:    /Users/user/Library/VirtualBox/HardDisks/XP.vdi
State:       created
Type:        normal
Usage:       XP (UUID: yyyyyyyy-yyyy-yyyy-yyyy-yyyyyyyyyyyy)
2. Backup virtual machine
There are two methods:
- Simply copy the VDI file to another location. (If you try opening this copy in a new VM later, you may receive a "Cannot register the hard disk ... with UUID ... because a hard disk ... with UUID ... already exists in the media registry ..." error. This can be resolved by assigning a new UUID:
VBoxManage internalcommands sethduuid XPcopy.vdi *)
- Or use the
clonehd command, which creates a cloned copy with a new UUID automatically:
VBoxManage clonehd XP.vdi XPclone.vdi
3. Resize drive
Specify the new size in MBs. In this example, we'll expand a 10GB virtual disk to 40GB:
sudo VBoxManage modifyhd XP.vdi --resize 40960
The process should complete in a few seconds.
4. Allocate new space †
- Download Parted Magic
- Open VirtualBox and select your VM
- Go to Settings > Storage to select the Parted Magic ISO image:
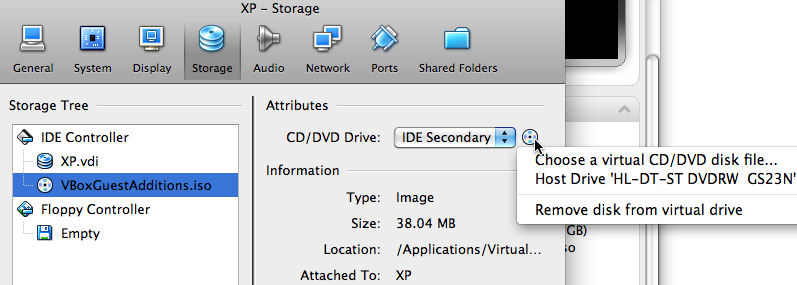
and then to Settings > System > Motherboard to set the boot order.
- Start the virtual machine. Once Parted Magic is booted, double click "Partition Editor" on the Desktop. You'll see something like this:
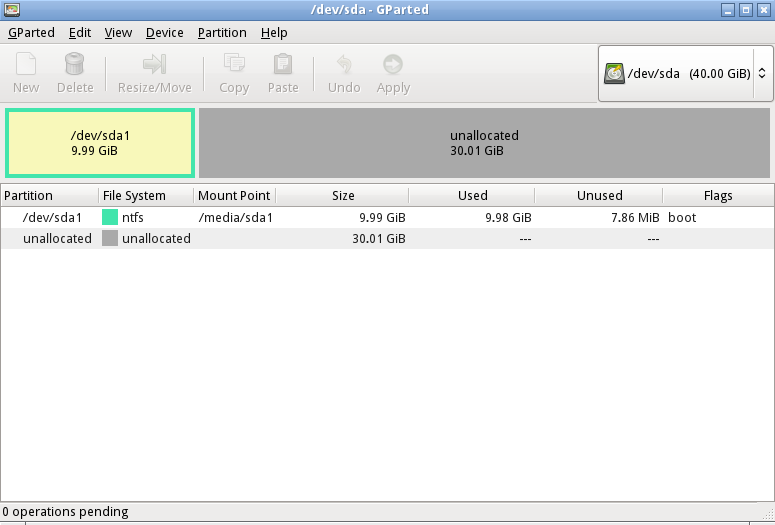
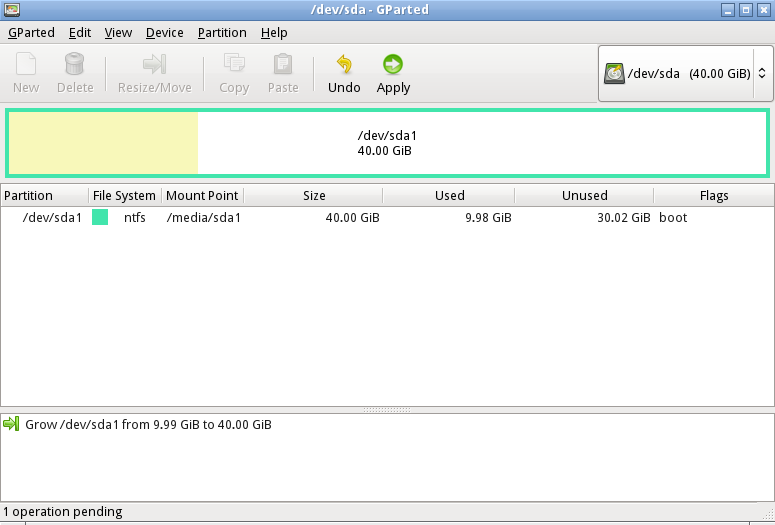
- In this example, you'd resize /dev/sda1 to take up the additional 30GB and click Apply:
Notes
- * In versions prior to 4,
setvdiuuid was used instead of sethduuid
- † There are a number of other ways to allocate the newly-created space; Disk Management (diskmgmt.msc) in Windows, diskutil in OS X, parted in *nix, etc. Parted Magic has the advantage of being nearly universal and also working on virtual machines that will no longer boot due to low disk space.
- Image resizing was added in VirtualBox 4.0.
- While these instructions were written for an OS X host and Windows XP guest, they should be applicable in most any environment. The path to VBoxManage.exe under Windows is C:\Program Files\Oracle\VirtualBox\VBoxManage.exe
Mad props
/misc | Apr 12, 2012
RSS | Archives