Removing the fan assembly from a Dell Optiplex 320 Mini Tower #
The Dell OptiPlex 320 User's Guide has loads of great info on removing and replacing parts, but sadly skips the fan assembly. Thankfully, the Dell Dimension 5100 Service Manual has the details; here's an abbreviated and slightly modified version:
- Loosen the two captive screws that attach the heat-sink assembly to the system board on either side of the assembly.
- Pivot the assembly toward the back of the computer. (This will lift the heat sink off the CPU, exposing the thermal compound. Probably a good time to clean it off and apply something better.)

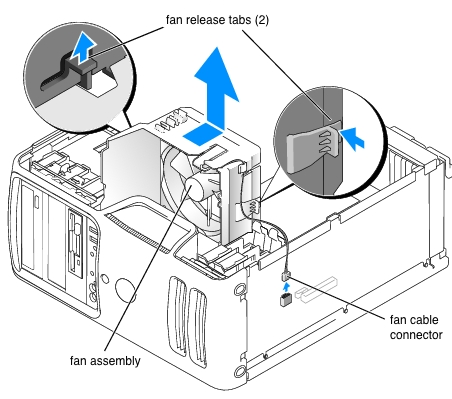
- Disconnect the fan cable connector from the motherboard.
- Simultaneously press the fan-release tab on one side of the fan assembly and pull the fan-release tab located on the bottom of the opposite side of the assembly upwards.
- Slide the fan assembly toward the back of the computer and lift to remove the assembly.
/misc | Jan 07, 2013
RSS | Archives